
Sauces & Condiments
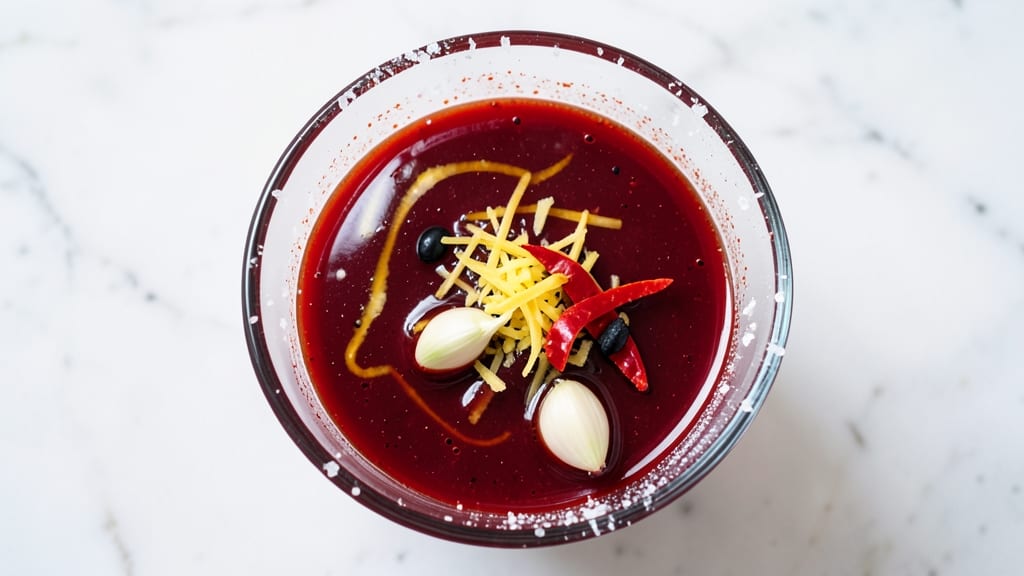
This authentic sweet chili sauce recipe delivers the perfect balance of sweet, tangy, and spicy flavors that elevate everything from stir-fries to grilled meats. The secret lies in carefully blending chili flakes, vinegar, and sugar while controlling the heat—no overpowering burn, just a slow-building warmth that lingers.
I’ve perfected this sauce over years of testing, ensuring every batch stays true to its bold, restaurant-quality roots while remaining simple enough for home cooks.
The magic happens in the reduction stage, where the sauce thickens slightly and deepens in flavor. A touch of garlic and a splash of rice vinegar add layers of complexity, while the sugar caramelizes just enough to create that signature glossy finish.
Unlike store-bought versions, this recipe avoids artificial additives, relying instead on fresh ingredients and precise timing to achieve the ideal consistency—thin enough to drizzle, thick enough to coat.
Once complete, you’ll have a versatile sauce that works as a dipping sauce for spring rolls, a marinade for grilled chicken, or a glaze for roasted vegetables.
The balance of sweetness and heat means it’s approachable for all palates, yet still packs enough punch to satisfy those who crave a little spice. Store it in the fridge for up to two weeks, or can it for long-term use—just be sure to taste and adjust as needed.
What sets this sauce apart is its authenticity without compromise. No shortcuts, no watered-down flavors—just a rich, complex condiment that transforms ordinary dishes into something extraordinary. Ready to make it? Let’s get started.
Ingredients for authentic sweet chili sauce
Nine ingredients transform into restaurant-quality sweet chili sauce with balanced heat and depth.
| Ingredient | Amount | Notes |
|---|---|---|
| Chili Flakes 🌶️ | 2 tbsp | Crushed slightly for even heat |
| Rice Vinegar 🍶 | ½ cup | White or seasoned preferred |
| Granulated Sugar 🍚 | ½ cup | Light brown sugar for depth |
| Garlic Cloves 🧄 | 3 cloves | Minced for aromatic depth |
| Fresh Ginger 🌿 | 1 tbsp | Finely grated, peeled |
| Low-Sodium Soy Sauce 🍜 | 2 tbsp | Kikkoman preferred |
| Sesame Oil 🫒 | 1 tbsp | Toasted, not flavored |
| Water 💧 | ¼ cup | Filtered for clarity |
| Diamond Crystal Kosher Salt 🧂 | ½ tsp | Adjusts to taste |
The chili flakes are the foundation—look for high-quality dried chilies at specialty stores like Whole Foods or Trader Joe's for vibrant color and robust flavor. Fresh ginger and garlic should be bright and firm, not woody or discolored. Kikkoman soy sauce delivers the umami depth this sauce needs, while light brown sugar caramelizes better than white for that signature gloss. For sesame oil, toasted varieties from Trader Joe's or Asian markets add nutty complexity without overpowering the sauce's balance.
No rice vinegar? Apple cider vinegar works in a pinch, though it adds slight tartness. Substitute honey or agave for sugar if you prefer, but reduce by 25% to avoid over-sweetness. Fresh chili paste can replace chili flakes—start with 1 tbsp and adjust to taste. The sauce's consistency relies on precise ratios; if you prefer it thicker, reduce the water by 1 tbsp. For a spicier version, add 1 tsp of gochujang or 1 extra tbsp of chili flakes, but taste as you go—authentic versions prioritize balance over heat.
Store the sauce in an airtight glass jar in the fridge for up to two weeks, where flavors meld beautifully. For long-term storage, can the sauce following proper sterilization methods—it keeps for up to a year unopened. Double the batch if you plan to use it frequently; the sauce only improves with time as the flavors deepen. Taste and adjust before serving—add a splash of vinegar for tang or a pinch of sugar to balance heat.
Why You'll Love This Recipe
- Five-Ingredient Magic: I swear, this sauce comes together with what’s already in my pantry. No fancy gadgets—just a pot, a whisk, and 20 minutes while my coffee brews. That’s it.
- Sweet Heat Balance: The chili flakes bring just enough kick, but the ginger and garlic ground it into something addictive—like a hug for your taste buds. Honestly, I’ve never met a store-bought version this spot-on.
- Dip, Drizzle, Repeat: Slather it on spring rolls, toss it with noodles, or let the kids dunk fries in it. I’ve even used it as a glaze for grilled chicken when I’m feeling fancy. (Yes, even on a Tuesday night.)
- Pantry Goldmine: A single batch lasts me weeks—tucked in the fridge for quick stir-fries or frozen for when I’m lazy. And since it’s mostly sugar and vinegar, it’s cheaper than takeout. My wallet thanks me.
Step-by-step instructions for authentic sweet chili sauce
This method delivers the perfect balance of sweet, tangy, and spicy flavors found in traditional Asian sweet chili sauces.
Bloom the Aromatics in Sesame Oil
Heat a small saucepan over medium-low heat and add the 1 tablespoon sesame oil. Allow it to warm for 30 seconds until fragrant but not smoking. Add the 3 cloves minced garlic and 1 tablespoon finely grated ginger, cooking for 1 minute until the garlic becomes translucent and just begins to color.
This step develops the aromatic foundation of your sauce. The low heat prevents burning while allowing the garlic and ginger to release their full flavor potential. Stir constantly to distribute the heat evenly and prevent any single piece from browning too quickly.
Add Vinegar and Sugar for Tangy-Sweet Base
Pour in the 0.5 cup rice vinegar and 0.5 cup granulated sugar, stirring continuously to dissolve the sugar completely. Increase heat to medium and bring the mixture to a gentle simmer, cooking for 3-4 minutes until slightly thickened and reduced by about 20%. You'll notice the sauce becoming syrupy with a glossy sheen.
The vinegar provides the necessary acidity to balance the sweetness while preventing the sugar from caramelizing too aggressively. This reduction step concentrates the flavors and creates the ideal viscosity for your sauce. Taste occasionally - the sugar should be fully dissolved with no graininess remaining.
Incorporate Chili Heat and Soy Depth
Reduce heat to low and stir in the 2 tablespoons crushed chili flakes and 2 tablespoons low-sodium soy sauce. Simmer gently for 2 minutes, stirring constantly to distribute the chili evenly. The sauce should develop a rich, glossy appearance with visible specks of red throughout.
This is where the authentic balance comes together. The chili flakes provide controlled heat that won't overpower the sweetness, while the soy sauce adds umami depth. The gentle simmer prevents the chili from becoming bitter. For a smoother texture, you can strain the sauce through a fine-mesh sieve after this step.
Finish with Water and Seasoning
Add the 0.25 cup water and 0.5 teaspoon Diamond Crystal kosher salt, stirring until fully combined. Return to a gentle simmer for 1 minute to allow the salt to dissolve completely. Remove from heat and let the sauce cool to room temperature - this allows all the flavors to meld together.
The water adjusts the consistency to a perfect pouring sauce while the salt enhances all the flavors. As it cools, you'll notice the sauce becomes even more balanced. For best results, allow the sauce to sit for at least 30 minutes before using, as this additional resting time improves the flavor profile significantly.
Pro Tips For Making Authentic Sweet Chili Sauce
- Simmer Low and Slow: I used to blast this sauce on high, thinking it’d cook faster—it just burned the garlic and turned the ginger bitter. Keep it at a gentle simmer (barely bubbles) for 15-20 minutes, stirring occasionally. That’s how the flavors meld without scorching.
- Peel Ginger Like a Pro: Skip the messy knife-and-peel method—just smack a knob of ginger on the counter with the flat side of your knife, then slice off the skin in one strip. You’ll save time and avoid losing chunks of flesh to the trash.
- Balance the Vinegar First: Taste the raw vinegar before adding sugar—it’s the only way to know how much sweetness you’ll need. If it’s sharp, go lighter on the sugar; if it’s mellow, don’t be shy. Adjusting here saves you from ending up with a gloppy or sour sauce later.
- Toast the Chili Flakes: Dry-toast the chili flakes in a small pan for 30 seconds before adding them to the sauce. It deepens their flavor and cuts through the vinegar’s tang. (Yes, even if they’re already red—trust the process.)
Dietary considerations for these flavors
Gluten-Free Adaptations
This sauce is naturally gluten-free as long as you use a certified gluten-free soy sauce like Kikkoman Gluten-Free Tamari. Simply swap the regular soy sauce for the gluten-free version without adjusting other ingredients. Always check labels—some brands process soy sauce in facilities that handle gluten-containing products. 🌱
Low-Sugar Options
For a lower-sugar version, reduce the granulated sugar to 3 tablespoons and replace the remaining 2 tablespoons with 1 tablespoon of honey or maple syrup. This maintains some sweetness while cutting calories.
Alternatively, use erythritol or monk fruit sweetener (about 1 tablespoon) for a zero-calorie option, though the texture may be slightly different.
Vegan-Friendly Adjustments
The recipe is already vegan, but if you're using store-bought ingredients, double-check that your soy sauce and sesame oil are plant-based. For extra richness, add 1 teaspoon of miso paste (white or red) to deepen the umami flavor.
The sauce works perfectly as a vegan dipping sauce for spring rolls or tofu dishes.
Spicy-Free Version
To eliminate heat entirely, omit the chili flakes and replace them with 1 teaspoon of smoked paprika for a mild, sweet-tangy flavor. This version still delivers depth but with zero spice. The sauce remains versatile for picky eaters or children.
Allergy Considerations
If you have sesame allergies, skip the sesame oil and replace it with 1 teaspoon of neutral oil (like avocado or light olive oil). For garlic allergies, substitute with 1 teaspoon of garlic powder (though fresh garlic provides better flavor). Always taste as you go to ensure balance.
Storage for Dietary Needs
For gluten-free or vegan storage, keep the sauce in an airtight glass jar in the fridge for up to 2 weeks. If canning for long-term storage, use sterilized jars and follow proper canning procedures.
The sauce remains stable for up to 1 year unopened. Always label jars with dietary notes to avoid cross-contamination. ✨
Nutrition facts
Frequently asked questions about sweet chili sauce
Can I make this sauce without fresh garlic and ginger?
Yes! For convenience, use 1 teaspoon garlic powder and 1 teaspoon ground ginger instead. While fresh adds depth, these powders work in a pinch. If using, add them with the vinegar and sugar at Step 2. For best results, try to find fresh ingredients—they make a noticeable difference in flavor.
How do I adjust the heat level in my sauce?
The recipe uses 2 tablespoons chili flakes for balanced heat. For more spice, add 1 extra tablespoon of chili flakes or ½ teaspoon of cayenne pepper. To reduce heat, strain out some chili flakes or add 1 extra tablespoon of sugar to balance. Always taste as you go!
Can I use this sauce as a marinade?
This sauce works beautifully as a marinade for grilled chicken, pork, or tofu. For best results, marinate for 30 minutes to 2 hours in the fridge. The sweetness caramelizes beautifully on the grill, creating a sticky, flavorful crust. Just reserve some sauce for serving after cooking.
Why did my sauce turn out too thick or too thin?
Consistency depends on the reduction time. For thicker sauce, simmer 1-2 extra minutes at Step 2. For thinner sauce, add 1 tablespoon water at the end. The ideal texture should coat the back of a spoon but still pour easily. If too thin, simmer uncovered to reduce further.
What are the best ways to use leftover sauce?
Leftover sauce keeps well for 2 weeks in the fridge. Use it as a dipping sauce for spring rolls, a glaze for roasted vegetables, or a stir-fry sauce. For extra flavor, add 1 teaspoon of sesame seeds** or a splash of water to thin it out. It also makes a great pizza sauce base!