
Sauces & Condiments
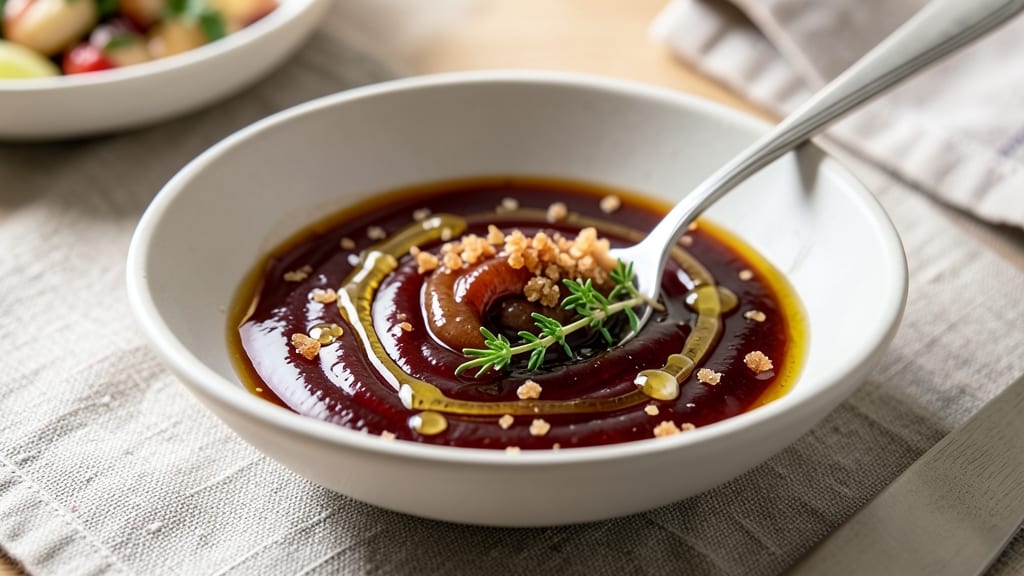
This balsamic teriyaki sauce transforms ordinary grilled meats and noodles into restaurant-worthy dishes with its perfect balance of sweet, tangy, and umami flavors. The secret lies in simmering balsamic vinegar with traditional teriyaki ingredients, creating a glossy sauce that caramelizes beautifully.
I developed this recipe after craving a richer, more complex teriyaki that still works as a marinade or glaze—no complicated techniques required.
The sauce starts with a simple base of soy sauce, brown sugar, and garlic, then builds depth through slow reduction with balsamic vinegar and a touch of honey. This process intensifies the flavors while maintaining that signature sticky, glossy texture.
The result? A sauce that's versatile enough for chicken, pork, or even vegetables, yet bold enough to stand out on its own.
What makes this sauce special is its dual purpose: it works as both a marinade (tenderizing proteins) and a finishing glaze (adding a caramelized crust). The balsamic adds a sophisticated tang that cuts through the sweetness, while the teriyaki base ensures that classic umami kick.
Best of all, it keeps well in the fridge for up to 2 weeks, so you can make a big batch and use it all week.
Ready in just 30 minutes, this sauce delivers professional-quality results with minimal effort. Whether you're grilling, stir-frying, or drizzling over noodles, the possibilities are endless. Let's get started!
Ingredients for balsamic teriyaki sauce
Sweet, tangy, and umami-packed—just eight ingredients for restaurant-quality teriyaki.
| Ingredient | Amount | Notes |
|---|---|---|
| Balsamic Vinegar 🍷 | ½ cup | High-quality aged variety preferred |
| Soy Sauce 🥢 | ½ cup | Low-sodium preferred for balance |
| Brown Sugar 🍚 | ½ cup | Light or dark, packed tightly |
| Honey 🍯 | 2 tbsp | Wildflower or clover preferred |
| Garlic Cloves 🧄 | 4 cloves | Minced finely for smooth texture |
| Extra-Virgin Olive Oil 🫒 | 2 tbsp | For richness and gloss |
| Fresh Ginger 🌿 | 1 tbsp | Finely grated, fresh preferred |
| Sesame Oil 🫒 | 1 tbsp | Toasted sesame preferred |
| Cornstarch 🌾 | 1 tbsp | For thickening, optional |
| Water 💧 | 2 tbsp | For cornstarch slurry |
The balsamic vinegar is the game-changer here—look for aged varieties (like Balsamic Glaze from Trader Joe's) for deeper caramel notes. The soy sauce? Low-sodium is key to avoid overpowering saltiness, but if you've only got regular, just reduce the amount slightly. Brown sugar adds body, but coconut sugar works too—it's less processed. Fresh ginger and garlic? Don't skip these—they're the umami backbone. I always grab ginger from the produce section, not the jarred stuff (it's just not the same).
No honey? Maple syrup or agave will work in a pinch, though honey's floral notes are ideal. Running low on sesame oil? Toasted peanut oil gives a similar nutty depth. The cornstarch slurry is optional but worth it—it gives that signature glossy finish. If you're making this for a crowd, double the batch (the sauce keeps beautifully). For extra richness, add a splash of vegetable broth instead of water when making the slurry.
This sauce gets better with time—let it sit overnight before using for maximum flavor development. Store in an airtight jar in the fridge for up to 2 weeks. Freezes perfectly for 3 months if you want to make a big batch. I like to portion it into small jars so I can grab just what I need for a quick glaze or marinade. The longer it sits, the more those caramelized flavors meld together—trust me on this.
Why You'll Love This Recipe
- Pantry Magic: I swear by this sauce—no fancy shopping trips needed. Just pull out your balsamic, soy sauce, and a handful of pantry staples, and boom. That rich, tangy-sweet balance comes together faster than takeout delivery.
- Glaze That Sticks: The honey and brown sugar caramelize like a dream, clinging to everything—grilled chicken, roasted veggies, even noodles. It’s the kind of sauce that makes you lick the plate, no exaggeration.
- Weeknight Swiss Army: Slap it on stir-fries, drizzle over baked salmon, or toss with pasta. Honestly, I’ve used it for breakfast (yes, on eggs) and it’s always a hit. One jar of sauce, endless possibilities.
- Leftovers That Don’t Suck: Make a double batch—it keeps for weeks in the fridge. The flavors actually deepen over time, so you’re not stuck with sad, watered-down sauce. Budget win, flavor win.
Step-by-step instructions for balsamic teriyaki sauce
This sauce delivers a perfect balance of sweet, tangy, and umami flavors—ideal for glazing grilled meats or tossing with noodles.
Sauté Aromatics in Olive Oil
Heat the 2 tablespoons extra-virgin olive oil in a medium saucepan over medium heat. Add the 4 minced garlic cloves and 1 tablespoon finely grated fresh ginger, stirring constantly for 30-45 seconds until fragrant but not browned. Real talk: garlic burns fast, so keep your eye on it.
Here's the thing—this step builds the flavor foundation. The ginger should be nearly invisible after grating, and the garlic should smell pungent but not bitter. If you notice any browning, reduce the heat immediately and let the aromatics cook gently until they mellow out.
Combine Wet Ingredients
Pour in the 0.5 cup balsamic vinegar, 0.5 cup soy sauce, and 0.5 cup packed brown sugar, stirring constantly to dissolve the sugar completely. Add the 2 tablespoons honey and 1 tablespoon sesame oil, then bring the mixture to a gentle simmer over medium-low heat.
Let it bubble for 5-7 minutes, stirring occasionally, until the mixture reduces by about one-third and becomes syrupy. You'll see the sauce thicken slightly and deepen in color—this is when the flavors start melding together. Don't rush this; patience here prevents a thin, watery sauce later.
Thicken the Sauce
In a small bowl, whisk together the 1 tablespoon cornstarch and 2 tablespoons water to create a smooth slurry. Slowly pour this into the simmering sauce while stirring continuously. The sauce will thicken dramatically within 1-2 minutes—keep stirring to prevent lumps.
Simmer for another 2-3 minutes until the sauce reaches your desired consistency. It should coat the back of a spoon smoothly but still be pourable. If it thickens too much, add 1 tablespoon water to loosen it. This is the moment that matters: the sauce should glisten with a glossy finish, ready to cling beautifully to whatever you're glazing.
Finish and Cool
Remove the sauce from heat and let it cool for 5 minutes. Taste and adjust seasoning—add a pinch more soy sauce for saltiness or brown sugar for sweetness if needed. The sauce will continue to thicken slightly as it cools, so don't worry if it looks a bit runny while hot.
For best results, let the sauce sit at room temperature for 15-20 minutes before using. This resting period allows the flavors to fully meld, resulting in a more cohesive, complex taste. Store any leftovers in an airtight container in the refrigerator for up to 1 week—it actually tastes better the next day as the flavors deepen.
Pro Tips For Making Balsamic Teriyaki Sauce
- Simmer Slow and Low: I learned this the hard way—boiling balsamic vinegar turns it bitter. Keep the heat at a gentle simmer (small bubbles, barely there) so the flavors meld without turning harsh. Yes, it takes longer, but the sauce will taste like it simmered for hours, not minutes.
- Toast the Garlic First: Crush those garlic cloves before tossing them in—it releases more flavor. Then, dry-toast them in the pan for 30 seconds until golden before adding liquids. Sounds weird, but it works: the nuttiness cuts through the sweetness and balances the tang.
- Balance the Sweet Early: Taste as you go. If the brown sugar or honey dominates, add a splash of soy sauce or a glug of balsamic to tighten things up. I skip this step half the time, and the sauce ends up cloying—your future self will thank you for checking at 5 minutes.
- Skip the Pre-Mixed Vinegars: Cheap balsamic vinegar (the kind in a plastic jug) won’t cut it here. Splurge on aged balsamic reduction—even a small bottle makes a difference. The depth of flavor is night and day, and you’ll use less because it’s so potent. (Yes, even if you’re impatient like me.)
Essential equipment for perfect results
Saucepan Essentials
Start with a medium-sized stainless steel saucepan—I swear by my All-Clad tri-ply—because it distributes heat evenly and prevents scorching. The saucepan should have a 2-quart capacity to give you room to stir without spilling.
Avoid non-stick pans for this recipe; they can't handle the high heat needed for proper reduction. 🔥
Heat Control Tools
A kitchen thermometer like the Thermoworks Thermapen helps monitor your sauce's temperature during reduction. Aim for a steady medium-low heat (around 180-200°F) to prevent burning. I also keep a long-handled silicone spatula nearby—it's heat-resistant and perfect for scraping up any caramelized bits from the bottom of the pan.
Mixing & Thickening Gear
For the cornstarch slurry, grab a small mixing bowl and a whisk—I prefer my OXO Good Grips whisk for smooth, lump-free results. A fine-mesh strainer (like the Ozeri Touch Screen) comes in handy if you want to remove any ginger bits for a silky texture.
Don't skip the strainer if you're particular about texture!
Storage Containers
Once your sauce is ready, transfer it to airtight glass jars with tight-sealing lids—I love Le Parfait 16-ounce jars for portion control. They stack neatly in the fridge and keep the sauce fresh for up to 2 weeks.
For longer storage, use freezer-safe plastic containers with 1-inch headspace to prevent cracking when frozen.
Optional Pro Tools
If you're serious about sauce-making, invest in an immersion blender like the Ninja Foodi to achieve a completely smooth finish. A digital scale (I use the Escali Primo) ensures precise measurements, especially for the cornstarch slurry.
For a restaurant-quality touch, add a silicon brush to coat your grilling tools with sauce before applying it to meats. 💡
Nutrition facts
Frequently asked questions
Can I make this sauce without cornstarch?
Yes! For a naturally thickened version, replace the cornstarch with 1 tablespoon honey (total 3 tbsp honey) and simmer the sauce for an extra 5-7 minutes until it reduces enough to coat the back of a spoon. The flavor will be slightly less glossy but still delicious.
How long should I marinate meat in this sauce?
For chicken or pork, use the sauce as a marinade for 30 minutes to 2 hours in the fridge. Thin proteins like fish only need 15-20 minutes to prevent over-marinating. Pro tip: Reserve 2 tbsp sauce for basting during cooking to maximize flavor.
Can I use this sauce on vegetables?
It works beautifully on roasted Brussels sprouts, broccoli, or even grilled eggplant. Toss veggies in 1 tbsp sauce with 1 tbsp olive oil and roast at 400°F for 15-20 minutes. The balsamic adds a tangy depth that pairs perfectly with roasted vegetables.
Why did my sauce turn out too thick?
This usually happens if you over-reduce it or use too much cornstarch. Thin with 1 tsp water at a time while stirring over low heat. For future batches, reduce the cornstarch to ½ tbsp or skip it entirely (see first FAQ). Always taste as you go!
How can I make this sauce spicier?
Add ½ tsp red pepper flakes or 1 tsp sriracha during the final 2 minutes of simmering. For heat lovers, blend in 1 tsp gochujang (Korean chili paste) with the cornstarch slurry. Adjust to taste after cooling.