
Sauces & Condiments
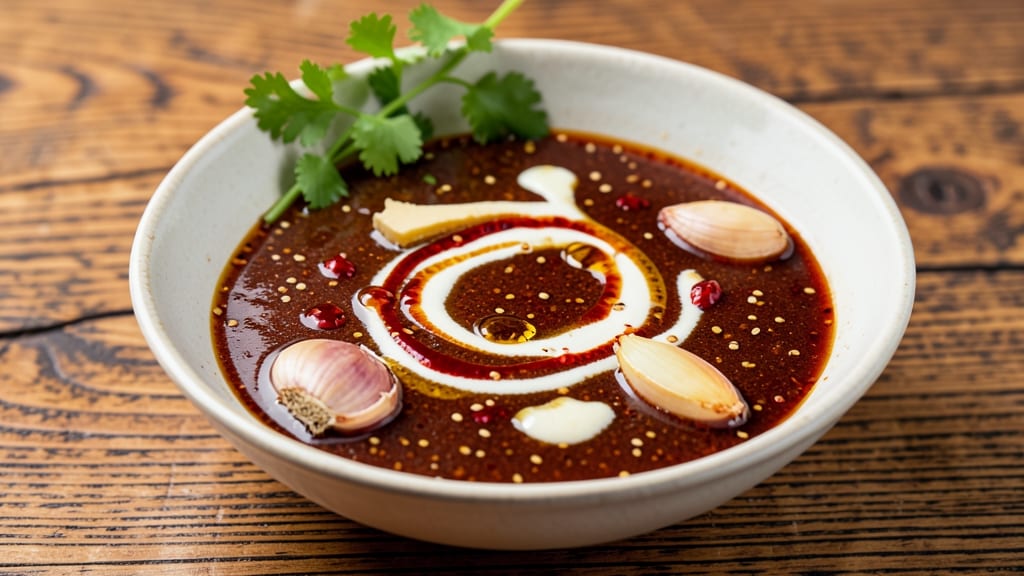
This Asian style sauce recipe transforms simple pantry staples into a versatile, umami-rich foundation for stir-fries, marinades, and dipping. The balance of sweet, salty, and tangy flavors comes together in just 15 minutes, with ingredients you likely already have.
What makes this sauce special is its adaptability—use it as-is for quick meals or customize it with garlic, ginger, or chili for deeper complexity.
The secret lies in slow reduction—simmering the sauce until it thickens into a glossy, clingy consistency that clings to every noodle, bite of chicken, or crispy vegetable. No special equipment is needed, just a saucepan and patience.
This isn’t your average bottled sauce; it’s packed with real flavor from fermented soy, aromatic spices, and a touch of acidity that brightens every dish.
By the end, you’ll have a sauce so versatile it elevates takeout-quality meals to homemade perfection. Drizzle it over stir-fries, toss it with rice, or serve it as a dipping sauce for spring rolls.
The best part? It keeps well in the fridge for up to 2 weeks, so you can make a big batch and use it all week.
Ready to master this sauce? Let’s break down the ingredients and technique—it’s simpler than you think, and the results are undeniably impressive.
Ingredients for asian style sauce
Pantry staples with a punch—this sauce packs umami, tang, and sweetness in perfect balance.
| Ingredient | Amount | Notes |
|---|---|---|
| Soy Sauce 🍶 | ½ cup | Use light or dark for balance |
| Rice Vinegar 🍶 | ¼ cup | White or seasoned vinegar |
| Honey 🍯 | ¼ cup | Or agave for vegan option |
| Sesame Oil 🫒 | 1 ½ tbsp | Toasted sesame oil preferred |
| Garlic Cloves 🧄 | 4 cloves | Minced for aromatic depth |
| Fresh Ginger 🌿 | 1 tbsp | Grated, for zesty kick |
| Cornstarch 🌾 | 1 tbsp | For thickening consistency |
| Water 💧 | ½ cup | For thinning if needed |
| Red Pepper Flakes 🌶️ | ½ tsp | Adjust for spice preference |
| Toasted Sesame Seeds 🥜 | 1 tbsp | For garnish and texture |
The soy sauce is your flavor anchor—Kikkoman or Pearl River Bridge are solid choices, but any good-quality brand works. For the vinegar, seasoned rice vinegar adds a subtle sweetness that cuts through the saltiness. Honey brings the sweetness, but agave or maple syrup work beautifully if you're avoiding refined sugar. Sesame oil is where the magic happens—look for toasted varieties at Asian markets or the international aisle of your grocery store. They usually have it in small bottles, which is perfect since you only need a little. Fresh ginger and garlic are non-negotiable for depth, but if you're in a pinch, powdered ginger at half the amount will work.
No sesame oil? Neutral oil like vegetable or peanut oil plus a pinch of toasted sesame seeds can mimic the flavor. Short on cornstarch? Arrowroot powder works 1:1. The red pepper flakes can be skipped entirely if you're sensitive to heat, but they add that little kick that makes the sauce sing. For extra richness, stir in a tablespoon of peanut butter or tahini at the end—trust me, it elevates everything. If you're making a big batch, double the cornstarch and water first to ensure smooth thickening. And if you burn the garlic, just start over—it's worth the extra minute.
This sauce keeps like a dream. Store it in an airtight container in the fridge for up to 2 weeks, or freeze it in ice cube trays for 3 months—perfect for quick portions. The longer it sits, the more the flavors meld together, so if you can wait a day before using it, do it. For serving, drizzle over hot noodles or stir-fries, or use it as a dipping sauce for spring rolls. The sesame seeds add texture, so sprinkle them on fresh every time. If the sauce thickens too much, just stir in a splash of water or broth to loosen it up.
Why You'll Love This Recipe
- Pantry Magic: I swear by this sauce—no shopping trips, just what’s already lurking in my cupboard. The soy, vinegar, and honey play off each other like old friends, and a single minced garlic clove (or two, if you’re me) adds that punchy kick without overpowering.
- Umami Bomb: That first swirl of sesame oil hitting the pan? Instant flavor upgrade. The garlic sizzles into caramelized perfection while the honey cuts through the saltiness, leaving you with a sauce that’s rich, tangy, and ridiculously good—no fancy techniques required.
- Weeknight Wonder: Drizzle it over stir-fries, toss it with noodles, or even slather it on grilled chicken. Between us, I’ve used this on takeout leftovers, lazy breakfasts, and even as a marinade. It’s the kind of sauce that turns “meh” into “actually delicious” in seconds.
- Budget Stretch: A few tablespoons of this sauce can transform a simple meal into something special—no need to splurge on pricey sauces. Plus, it keeps for weeks in the fridge, so I make a big batch and use it like my own secret weapon. (Yes, even on a Tuesday night.)
Step-by-step instructions for Asian style sauce
This sauce comes together faster than you'd expect—just a few minutes of prep and simmering.
Bloom the Aromatics in Sesame Oil
Heat a small saucepan over medium-low heat and add the 1.5 tablespoons sesame oil. Once the oil shimmers but isn't smoking, add the 4 minced garlic cloves and 1 tablespoon grated fresh ginger. Cook for 30-45 seconds until the garlic turns golden and you can smell that deep, fragrant aroma.
Here's the thing—don't let the garlic burn. It should smell sweet and nutty, not bitter. If it starts to darken too quickly, reduce the heat immediately. These aromatics form the flavor foundation of the sauce, so take your time with this step. Once fragrant, remove the pan from heat and set aside temporarily.
Combine Wet Ingredients
In a separate bowl, whisk together the 0.5 cup soy sauce, 0.25 cup rice vinegar, and 0.25 cup honey until fully combined. The mixture will look syrupy and glossy. I like to use a fork for this—it's simple and effective. Add the 0.5 teaspoon red pepper flakes and stir them in evenly.
This is where the sauce's balance comes together. The soy sauce provides umami depth, the rice vinegar adds brightness, and the honey rounds out the flavors with natural sweetness. The red pepper flakes will give it just a hint of heat—adjust to your preference if you want it milder or spicier.
Create the Cornstarch Slurry
In a small bowl, whisk together the 1 tablespoon cornstarch and 0.5 cup water until completely dissolved. The mixture should be smooth with no lumps. This slurry is what will give your sauce that perfect, velvety consistency without making it gluey.
I've found that using cold water for the slurry helps prevent lumps better than warm water. Give it a quick stir to make sure everything is evenly combined before adding it to the sauce. This step is crucial—if you skip it or don't dissolve the cornstarch completely, your sauce will end up too thin and watery.
Simmer and Thicken the Sauce
Return the saucepan with the garlic and ginger to medium heat. Pour in the wet ingredient mixture and bring to a gentle simmer. Once bubbling, add the cornstarch slurry all at once and stir constantly with a wooden spoon. The sauce will thicken noticeably within 1-2 minutes.
Here's the moment that matters: keep stirring until the sauce reaches a consistency where it coats the back of a spoon but isn't gluey. It should be smooth and glossy, with just the right amount of body. If it's too thick, you can add a splash of water to thin it out. Taste and adjust seasoning—you might want to add a bit more soy sauce for saltiness or honey for sweetness.
Finish and Garnish
Remove the sauce from heat and let it cool slightly for 2-3 minutes. This resting period allows the flavors to meld together. Once cooled, stir in the 1 tablespoon toasted sesame seeds. They'll add a beautiful nutty crunch and visual contrast to the smooth sauce.
Real talk: this sauce tastes even better after it's had a chance to sit for 10-15 minutes. The flavors continue to develop and deepen. Store any leftovers in an airtight container in the refrigerator for up to 2 weeks. It's perfect for stir-fries, dipping sauces, or even as a marinade—just don't forget to give it a quick stir before using.
Pro Tips For Making Asian Style Sauce
- MINCE THE GARLIC: DESCRIPTION: Throwing in whole cloves? Stop. Use a knife to smash them flat first, then chop—this releases more flavor without burning. I learned this the hard way when my sauce tasted underwhelming until I tried it.
- WARM THE SESAME OIL: DESCRIPTION: Cold sesame oil will make your sauce taste raw and bitter. Heat it gently until just shimmering (30 seconds max) before adding anything else—this brings out its nutty aroma without frying it.
- DILUTE THE HONEY FIRST: DESCRIPTION: Dumping thick honey straight into hot vinegar or soy sauce? It’ll clump like glue. Mix it with a splash of warm water first, then stir it into the sauce—smooth every time.
- TASTE AS YOU GO: DESCRIPTION: Balance matters. After combining soy, vinegar, and honey, taste before adding sesame oil—adjust salt or sweetness now, not later. (Yes, even if the recipe says "add all ingredients first.")
Common mistakes when making your asian style sauce
Burning the Garlic
Nothing ruins a sauce faster than burnt garlic, and it’s easier to do than you think. When you add the 4 minced garlic cloves to the sesame oil, keep the heat at medium-low and watch closely. Garlic burns in 10-15 seconds, turning bitter and acrid.
If it darkens too quickly, remove the pan from heat immediately and let it cool. Trust me, the sweet, nutty aroma of properly bloomed garlic is the foundation of this sauce—don’t skip this step! 🌶️
Skipping the Slurry
The cornstarch slurry is what transforms your sauce from watery to velvety, and skipping it is a common mistake. If you just toss in dry cornstarch, you’ll end up with clumps or a gluey mess.
Always whisk the 1 tablespoon cornstarch with 0.5 cup cold water first to create a smooth slurry. This ensures even thickening and a silky texture. Pro tip: Add the slurry all at once while stirring constantly—this prevents lumps and guarantees a professional finish.
Overcooking the Sauce
Once the sauce starts simmering, it’s tempting to let it bubble away, but overcooking reduces the flavors and can make it too thick. After adding the slurry, stir constantly for just 1-2 minutes until it reaches a glossy, spoon-coating consistency.
If it’s too thick, a splash of water or broth will fix it. Overcooking also intensifies the vinegar’s sharpness—balance is key. Taste as you go and remove it from heat as soon as it thickens. Patience here makes all the difference!
Ignoring the Resting Time
This sauce tastes even better after resting for 10-15 minutes, but many people can’t resist using it immediately. The flavors need time to meld, and the sauce will thicken slightly as it cools. If you’re in a hurry, at least let it sit for 2-3 minutes before garnishing.
The sesame seeds will also toast slightly during this time, adding extra depth. Skipping this step can leave the sauce tasting flat or disjointed—worth the wait!
Using Low-Quality Ingredients
The quality of your ingredients directly impacts the sauce’s flavor. Don’t cut corners with cheap soy sauce or unseasoned vinegar—they’ll make your sauce taste dull. Invest in a good Kikkoman or Pearl River Bridge soy sauce and seasoned rice vinegar for brightness.
Even the sesame oil matters: toasted varieties add a rich, nutty depth that regular oil can’t match. If you’re using substitutions (like agave for honey), ensure they’re high-quality too. Your taste buds will notice the difference!
Not Adjusting Seasoning
Every kitchen has different humidity levels and ingredient variations, so your sauce might need tweaking. After simmering, taste and adjust: add a pinch more soy sauce for saltiness, honey for sweetness, or a splash of vinegar for tang.
The goal is balance—umami, sweet, salty, and a hint of heat should all shine. Don’t be afraid to taste as you go; it’s the only way to get it just right. 💡
Nutrition facts
Frequently asked questions
Can I make this sauce without cornstarch?
The cornstarch slurry creates that perfect velvety texture, but you can substitute 1 tablespoon arrowroot powder or even 1/2 teaspoon xanthan gum for a similar effect. For a thicker sauce without thickening agents, simmer longer on low heat, but expect a slightly different consistency. The sauce will be more liquid but still flavorful!
How can I adjust the spice level?
Start with the 0.5 teaspoon red pepper flakes as written, but you can easily adjust. For milder heat, reduce to 1/4 teaspoon or omit entirely. For extra spice, add 1 teaspoon or swap in 1/2 teaspoon chili garlic sauce. Fresh chili like Thai bird's eye pepper works too—just remove seeds for less heat. Always taste as you go!
What dishes work best with this sauce?
This versatile sauce shines on stir-fries, grilled meats, and rice bowls, but don't stop there! Use it as a dipping sauce for spring rolls or dumplings, a marinade for tofu or chicken, or even a glaze for roasted vegetables. The balance of flavors works well with pork, shrimp, or noodles—just experiment!
Can I make this sauce vegan?
Swap the honey for agave or maple syrup and use a vegan soy sauce (like Kikkoman Vegan). For extra richness, stir in 1 tablespoon tahini at the end. The sauce will maintain all its umami depth while being completely plant-based.
Why did my sauce turn out too thin?
Thin sauce usually means the cornstarch didn't fully activate. Make sure you whisked it with cold water until completely dissolved, then added it to the simmering liquid. If it's still too thin, stir in 1/2 teaspoon more cornstarch mixed with 1 tablespoon water and simmer another minute. For future batches, simmer slightly longer on low heat to thicken naturally.