
Sauces & Condiments
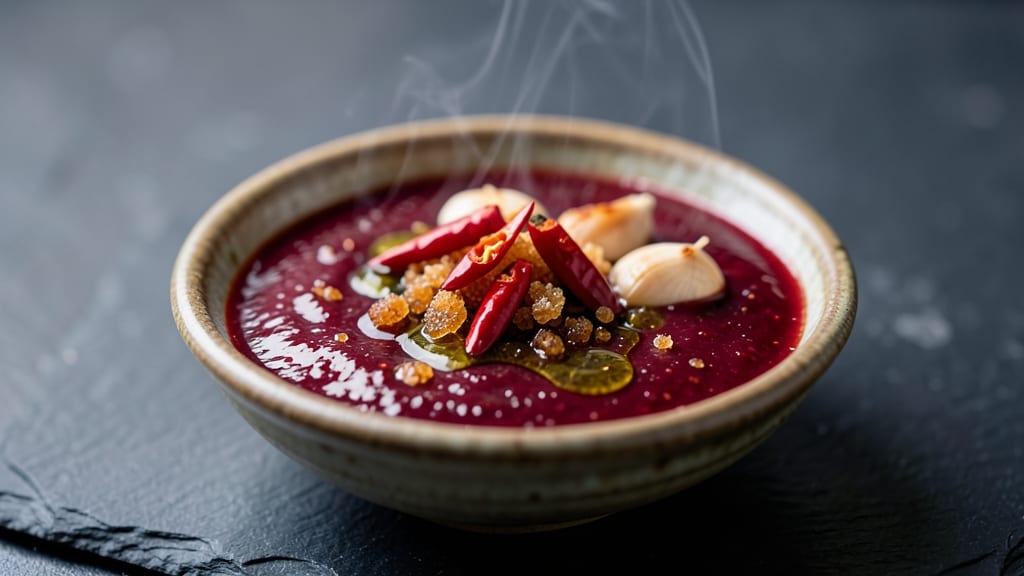
This Asian chilli sauce recipe delivers the perfect balance of fiery heat, tangy brightness, and natural depth—no artificial preservatives in sight. The secret lies in simmering fresh chilies, garlic, and aromatics with vinegar and a touch of sugar until the flavors meld into a glossy, versatile condiment.
I developed this version after years of testing store-bought sauces that always fell short of restaurant-quality intensity.
The beauty of this sauce is its simplicity: just five core ingredients create something complex enough to elevate stir-fries, dipping sauces, or marinades. Fresh red chilies provide the heat, while rice vinegar adds that signature tang.
A light simmer reduces the mixture into a thick, vibrant sauce that clings beautifully to noodles or proteins. The optional addition of shrimp paste or soy sauce deepens the umami profile for extra complexity.
What you'll end up with is a sauce that's bold enough to stand up to spicy dishes but balanced enough to use as a dipping sauce or stir-fry glaze. The natural fermentation process (if using shrimp paste) adds layers of depth that store-bought versions can't match.
This recipe makes about 1½ cups—enough to transform your favorite Asian dishes with authentic flavor.
Store it in the refrigerator for up to 2 weeks, where the flavors will continue to develop and intensify. For longer storage, preserve it in a sterilized jar in the fridge for up to 3 months.
The versatility of this sauce makes it a must-have in any kitchen, ready to enhance everything from dumplings to grilled meats.
Ingredients for asian chilli sauce
Five simple ingredients that pack a punch—no artificial junk here.
| Ingredient | Amount | Notes |
|---|---|---|
| Fresh Red Chilies 🌶️ | ½ cup | Seeds removed for less heat |
| Garlic Cloves 🧄 | 6 cloves | Peeled and smashed for flavor |
| Rice Vinegar 🍶 | ½ cup | White or seasoned variety |
| Granulated Sugar 🍚 | 2 tbsp | Balances tangy heat |
| Shrimp Paste 🦐 | 1 tbsp | Optional for umami depth |
| Olive Oil 🫒 | 2 tbsp | For glossy finish |
| Salt 🧂 | ½ tsp | Adjust to taste |
| Soy Sauce 🥢 | 1 tbsp | Optional for extra umami |
Fresh chilies are the heart of this sauce, so pick the hottest you can handle. I grab mine from the Asian market section, but the regular grocery store usually has them too. If you can't find fresh, dried red chilies rehydrated in hot water are a solid backup. Garlic? Freshly smashed releases more flavor than pre-minced. The shrimp paste is optional but adds that restaurant-quality depth—look for it in the Asian aisle or skip it if you're avoiding seafood.
No shrimp paste? Soy sauce or a dash of fish sauce (if you're not strict vegan) brings the umami. The rice vinegar should smell bright and tangy—never flat. If you're short on sugar, honey or maple syrup works too, but sugar keeps it stable. Olive oil is just for that glossy finish—any neutral oil works. Pro tip: let the sauce sit overnight if you can—the flavors meld even better. And if you're worried about heat, remove the seeds and membranes from the chilies first.
This sauce keeps beautifully in the fridge for 2 weeks, with flavors getting deeper over time. For longer storage, sterilize a jar and keep it submerged in vinegar or oil. I always make a double batch—one for immediate use, one to stash. The leftovers? Perfect for drizzling over noodles, mixing into marinades, or even slathering on grilled meats. Freeze portions in ice cube trays if you're prepping ahead.
Why You'll Love This Recipe
- I swear by this one: just pulse chilies, garlic, and shrimp paste in a food processor—no peeling, no mincing, no mess. The vinegar and sugar take care of themselves while you’re still wiping your hands.
- No-Fuss Blend: I swear by this one: just pulse chilies, garlic, and shrimp paste in a food processor—no peeling, no mincing, no mess. The vinegar and sugar take care of themselves while you’re still wiping your hands.
- Umami Bomb: That shrimp paste? It’s the secret weapon—deep, funky, and addictive. The sugar cuts the heat just enough to let the garlic shine through, like a perfect balance of sweet and smoky punch.
- Pantry Staple: Honestly, this sauce turns everything better: dipping for spring rolls, glaze for grilled meats, even a zesty kick in ramen. I keep a jar in the fridge because it’s the one thing I never run out of.
Step-by-step instructions for Asian chili sauce
Here's how to make a bold, balanced sauce that's perfect for dipping, marinating, or finishing dishes.
Prepare the Chilies and Garlic
Start by removing the seeds from the 0.5 cup fresh red chilies—this controls the heat level while keeping the sauce vibrant. Finely chop the chilies into small pieces, about ⅛-inch in size. The smaller the pieces, the more evenly the heat will distribute throughout the sauce.
Next, peel and smash the 6 cloves garlic with the flat side of a knife or the bottom of a glass. You want them broken down but not turned into a paste—this ensures maximum flavor without bitterness. Set both aside for now; we'll cook them together to build the sauce's aromatic foundation.
Bloom the Aromatics in Olive Oil
Heat a small saucepan over medium-low heat and add the 2 tablespoons olive oil. Let it warm for 30 seconds until shimmering but not smoking. Add the chopped chilies and smashed garlic, stirring constantly for 2-3 minutes until the garlic turns golden and fragrant.
Watch closely here—garlic burns quickly, and that would make the sauce bitter. If it starts to darken too much, reduce the heat slightly. The chilies should soften but not disintegrate; this step develops their natural sweetness and depth of flavor.
Add Vinegar and Sugar
Pour in the 0.5 cup rice vinegar and 2 tablespoons granulated sugar, stirring to combine. Increase the heat to medium and let the mixture simmer for 5 minutes, stirring occasionally. The vinegar will help break down the chilies' cell walls, releasing their oils and creating a smoother sauce.
You'll notice the sugar starts to dissolve, balancing the acidity of the vinegar and the heat of the chilies. The mixture should reduce slightly, becoming thicker and glossier. This is where the sauce's signature tangy-sweet profile begins to form.
Incorporate Umami and Season
Reduce the heat to low and stir in the 1 tablespoon shrimp paste (if using) and 1 tablespoon soy sauce. The shrimp paste adds a deep, savory umami that ties everything together, while the soy sauce enhances the overall complexity. Let the sauce simmer for another 3-4 minutes, stirring constantly.
Add the 0.5 teaspoon salt and taste the sauce. Adjust the salt if needed—this is where you can fine-tune the flavor. The sauce should be vibrant, with a perfect balance of heat, tang, sweetness, and umami. If it's too thick, add 1-2 tablespoons water to reach your desired consistency.
Finish and Cool
Remove the sauce from heat and let it cool to room temperature. The flavors will continue to meld as it sits, deepening the overall taste. For the best results, transfer the sauce to a clean jar and refrigerate for at least 1 hour before using. This allows the flavors to fully develop and the sauce to thicken slightly.
The sauce will keep in the refrigerator for up to 2 weeks, making it perfect for batch cooking. Use it as a dipping sauce for spring rolls, a marinade for grilled meats, or a finishing touch for noodle dishes. The heat will mellow slightly over time, but the tangy, umami-rich profile will remain vibrant.
Pro Tips For Making Asian Chilli Sauce
- CHAR THE SHRIMP PASTE: After burning three batches, I learned shrimp paste needs low-and-slow heat—start on medium, then drop to simmer. It’s the thing that matters most: rush it, and you’ll end up with bitter, acrid sauce instead of that deep umami punch. Stir constantly for the first 3 minutes, then let it mellow.
- MINCE GARLIC FINE: Skip the rough chop—finely mince your garlic (almost paste-like) so it dissolves completely. I used to leave chunks, and they’d turn to mush or burn before the sauce came together. This way, every bite gets that subtle garlic warmth without texture surprises.
- VINEGAR LAST: Add rice vinegar after the chilies and sugar have cooked down for 5 minutes—this balances the heat and sweetness better. Dump it in early, and you’ll fight a sour, watery sauce instead of a glossy, tangy finish. Trust me, that 5-minute wait makes a real difference.
- USE DRY CHILI STEMS: Don’t toss the chili stems—they add extra heat and depth without bitterness. Toss them in whole with the chilies at the start, then fish them out later if you’re sensitive to texture. I was skeptical until I tried it; now I double-check I’m not throwing them away.
Troubleshooting this dish
Overly Thin Sauce
If your sauce turns out too watery, you likely didn’t reduce it enough during simmering. Always cook the vinegar and sugar mixture over medium heat for the full 5 minutes—this helps thicken the sauce naturally.
For extra thickness, let it cool completely and refrigerate for 1-2 hours; the flavors will meld and the sauce will naturally thicken. If it’s still too thin, simmer it again for another 2-3 minutes over low heat. 🌡️
Muted or Bland Flavor
Bland sauce usually means the garlic didn’t bloom properly or the umami components were underused. Always cook the garlic in olive oil over medium-low heat until golden—never let it burn.
For deeper flavor, add ½ teaspoon fish sauce (if not avoiding seafood) or an extra ½ tablespoon soy sauce during the final simmer. Let it sit overnight before using—flavors develop more over time. 💡
Sauce Too Spicy
If the heat is overwhelming, you likely didn’t remove enough seeds from the chilies or used too many. For future batches, remove all seeds and membranes before chopping. To fix a batch that’s too spicy, stir in 1-2 tablespoons honey or maple syrup to balance the heat.
Alternatively, thin it slightly with 1 tablespoon water and let it cool—this dilutes the capsaicin slightly. 🌶️
Sauce Separates or Looks Oily
This happens when the oil and vinegar aren’t fully emulsified. To prevent it, stir constantly while simmering and avoid high heat. If it separates, whisk vigorously or blend briefly with an immersion blender to recombine.
For extra stability, add ½ teaspoon xanthan gum (optional) during the final simmer. Store properly in an airtight container to prevent future separation. ⚡
Fermentation Gone Wrong
If using shrimp paste, improper storage can cause off flavors or mold. Always use sterilized jars and store submerged in oil or vinegar. If the sauce smells sour or funky, discard it—fermentation should add depth, not spoilage.
For a safer approach, skip shrimp paste and rely on soy sauce or extra garlic for umami. 🦠
Sauce Too Sweet or Tart
Balance is key! If the sugar overpowers, add 1-2 tablespoons rice vinegar to cut sweetness. If it’s too tart, stir in ½ teaspoon sugar or honey. Taste as you go—adjust gradually. For future batches, use 1 tablespoon sugar instead of 2 to start, then adjust to preference. 🍯
Nutrition facts
Frequently asked questions
Can I make this chili sauce without shrimp paste?
Shrimp paste adds umami depth but isn't essential. For a vegetarian version, substitute with ½ teaspoon fish sauce (if acceptable) or 1 extra tablespoon soy sauce. The sauce will still be flavorful—just slightly less complex. Garlic and vinegar provide enough tangy brightness to carry the dish.
How can I adjust the heat level?
For milder heat, remove all seeds and membranes from the chilies before chopping. If your sauce is already too spicy, balance it by adding 1-2 tablespoons honey or maple syrup to mellow the capsaicin. For future batches, reduce the chili quantity by ¼ cup or use milder varieties like jalapeños.
What's the best way to store this sauce?
Transfer to a clean, airtight jar and refrigerate for up to 2 weeks. For longer storage, preserve in a sterilized jar submerged in oil or vinegar—this prevents mold and maintains freshness for 3 months. The flavors actually improve with time, so make a double batch if you can!
Can I use this sauce in cooking or just as a dip?
This versatile sauce works in countless ways! Use it as a dipping sauce for spring rolls, a marinade for grilled meats, or a stir-fry finishing sauce. The tangy-sweet balance enhances noodle dishes, tacos, and even sandwiches. Start with 1 tablespoon per serving and adjust to taste.
Why does my sauce look oily after cooling?
This happens when oil and vinegar separate due to insufficient emulsification. To fix it, whisk vigorously or blend briefly with an immersion blender. For prevention, stir constantly during simmering and avoid high heat. Adding ½ teaspoon xanthan gum (optional) during cooking can also improve stability.